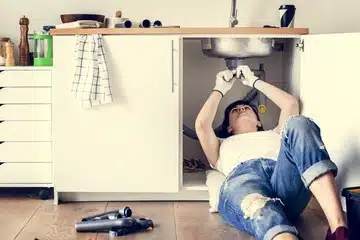
House repairs can feel like a never-ending job, especially when small scratches and dings build up on furniture, floors, walls, and other places around the home.
But we have good news: most of the time, there are easy fixes to these needed repairs that you can DIY at low cost and with little effort. With a little elbow grease and a trip to the hardware store, you can eliminate many of the needed repairs in your home that may have been lingering in the back of your mind.
In this article we’ll share 5 of our favorite house repairing tips to give your home a quick facelift and make surfaces around your house look good as new.
5 House Repairing Tips for Common Scratches and Dings
Wood filler
Knicks, gaps, and blemishes in your wood floors, doors, and other surfaces are inevitable over time. Fortunately, you can use wood filler to fill them in and make your wood look newly finished. Wood filler comes in different shades to match any stain or finish to make your repair job invisible.
In total, this job takes about 20-30 minutes to complete and a few hours total, including drying time. Equipment you’ll need include the wood filler, a putty knife, a sander, a rag, and your stain color.
First, mix the wood filler in its container (it separates from sitting on the shelf). Then apply it to the gap or hole using the putty knife. Smooth it over with your fingertip and then sand it to make it completely flat with your wood surface. Wipe it down with a rag and then stain the area the same color as the rest of the wood.
Drywall repair
A dent or hold in the wall can feel like a disaster — but it’s actually one of the most common DIY house repairing tasks people take on. Moving furniture, rambunctious kids and pets, and other day-to-day activities in the home can lead to damaged walls, and homeowners and renters can avoid a lot of stress by knowing how to fix it at home with a dry wall repair kid or a few separate pieces of equipment.
If you want your equipment in a neat package with clear instructions, a drywall repair kit like the one from 3M or Gorilla might be the best way to go. If you’re handy and you have some home repair equipment laying around, you may already have what you need. Here’s more on how to DIY a drywall repair:
Leather repair
If you’ve got a really great piece of leather furniture that’s seen some wear and tear over the years, all is not lost! There are leather repair kits available for nearly every kind of damage it can sustain — cracks, rips, stains, fading, and more.
In every case, be sure to match your leather repair kit to the color of your furniture. Then, choose an option made for the type of damage you’re repairing. Some kits are built for a single color or damage repair, while others are more versatile and can be used for a variety of repairs.
Be sure to shop around to choose the kit that’s right for you — just definitely don’t toss that great furniture when you can easily fix it!
Metal scratches
Scratches can be an eyesore on appliances, hardware, doorknobs and other metal surfaces in the home. There are a few methods for removing these scratches and making metal look shiny and new. You may want to adjust your approach depending on the type of metal you’re repairing (hard metals may take more time, while softer metals are typically easier to repair).
One common method is to use vinegar and a microfiber cloth to gently rub surface scratches away in a circular motion. As long as you rinse the vinegar from the metal surface after rubbing the scratch out, you don’t have to worry about staining.
Alternatively, you can use metal polish with a microfiber cloth. In this case, be sure the polish you choose is made for the type of metal you’re repairing. Some polishes are multi-purpose, but others contain ingredients for specific metals like copper, brass, or stainless steel. When you use polish, rub in a single direction rather than circular motion. Wipe excess polish away when dry.
Lastly, you can use wet/dry sandpaper or scrubbing pads to repair deeper metal scratches. This method is often necessary when scratches can’t be removed by rubbing methods, but it does require a more careful approach. Sanding or scrubbing the opposite way of the metal grain, for example, can cause more scratching rather than repairing it. Be sure to follow directions (like those outlined in the video below) for proper execution.
White toothpaste
Did you know white toothpaste is a mild abrasive that can be used to remove scratches on a variety of surfaces? All you need to do is make sure the toothpaste is white and gentle (Arm & Hammer is a good brand for this purpose), and you can easily take on scratches around the home and even on your cell phone.
Surfaces to try this on include: stainless steel appliances, mirrors and windows, mobile phone screens, watch faces, and car exteriors.
For best results, use a microfiber cloth, apply the toothpaste to the surface you’re repairing, and rub gently. For stainless steel or any grain surfaces, be sure to rub in the same direction as the grain to avoid further scratching. For glass surfaces, use a gentle circular motion to remove the scratch.
Over to you
We hope these tips are helpful for you around the home. For more on home cleaning, maintenance, and renovations, follow the Oberer Homes blog. If you’re from the Dayton area, you’ll also enjoy our Dayton area guides and other community-related updates.
Happy home repairing!
Share this Post
